Curious Farms Market
Where Vintage and Farm Meet
House Boxes

To make your own house boxes, download the template, cut, embellish, and put together. Or you can purchase a kit with the pre-cut chipboard pieces.
Once you decorate your house, place a small LED light inside and use as a fun nightlight or ambiance lamp. I thought it would be fun to do a whole row of them on a shelf.
House templates

House Kit
Click the image to shop for the house kit. Or use the template above to cut your own!
Simple Stitched Place Mat

Do you remember the neat fruit and veggie stamps we made? I used them on this fun simple place mat. Download the pattern below.
<<Place mat pattern
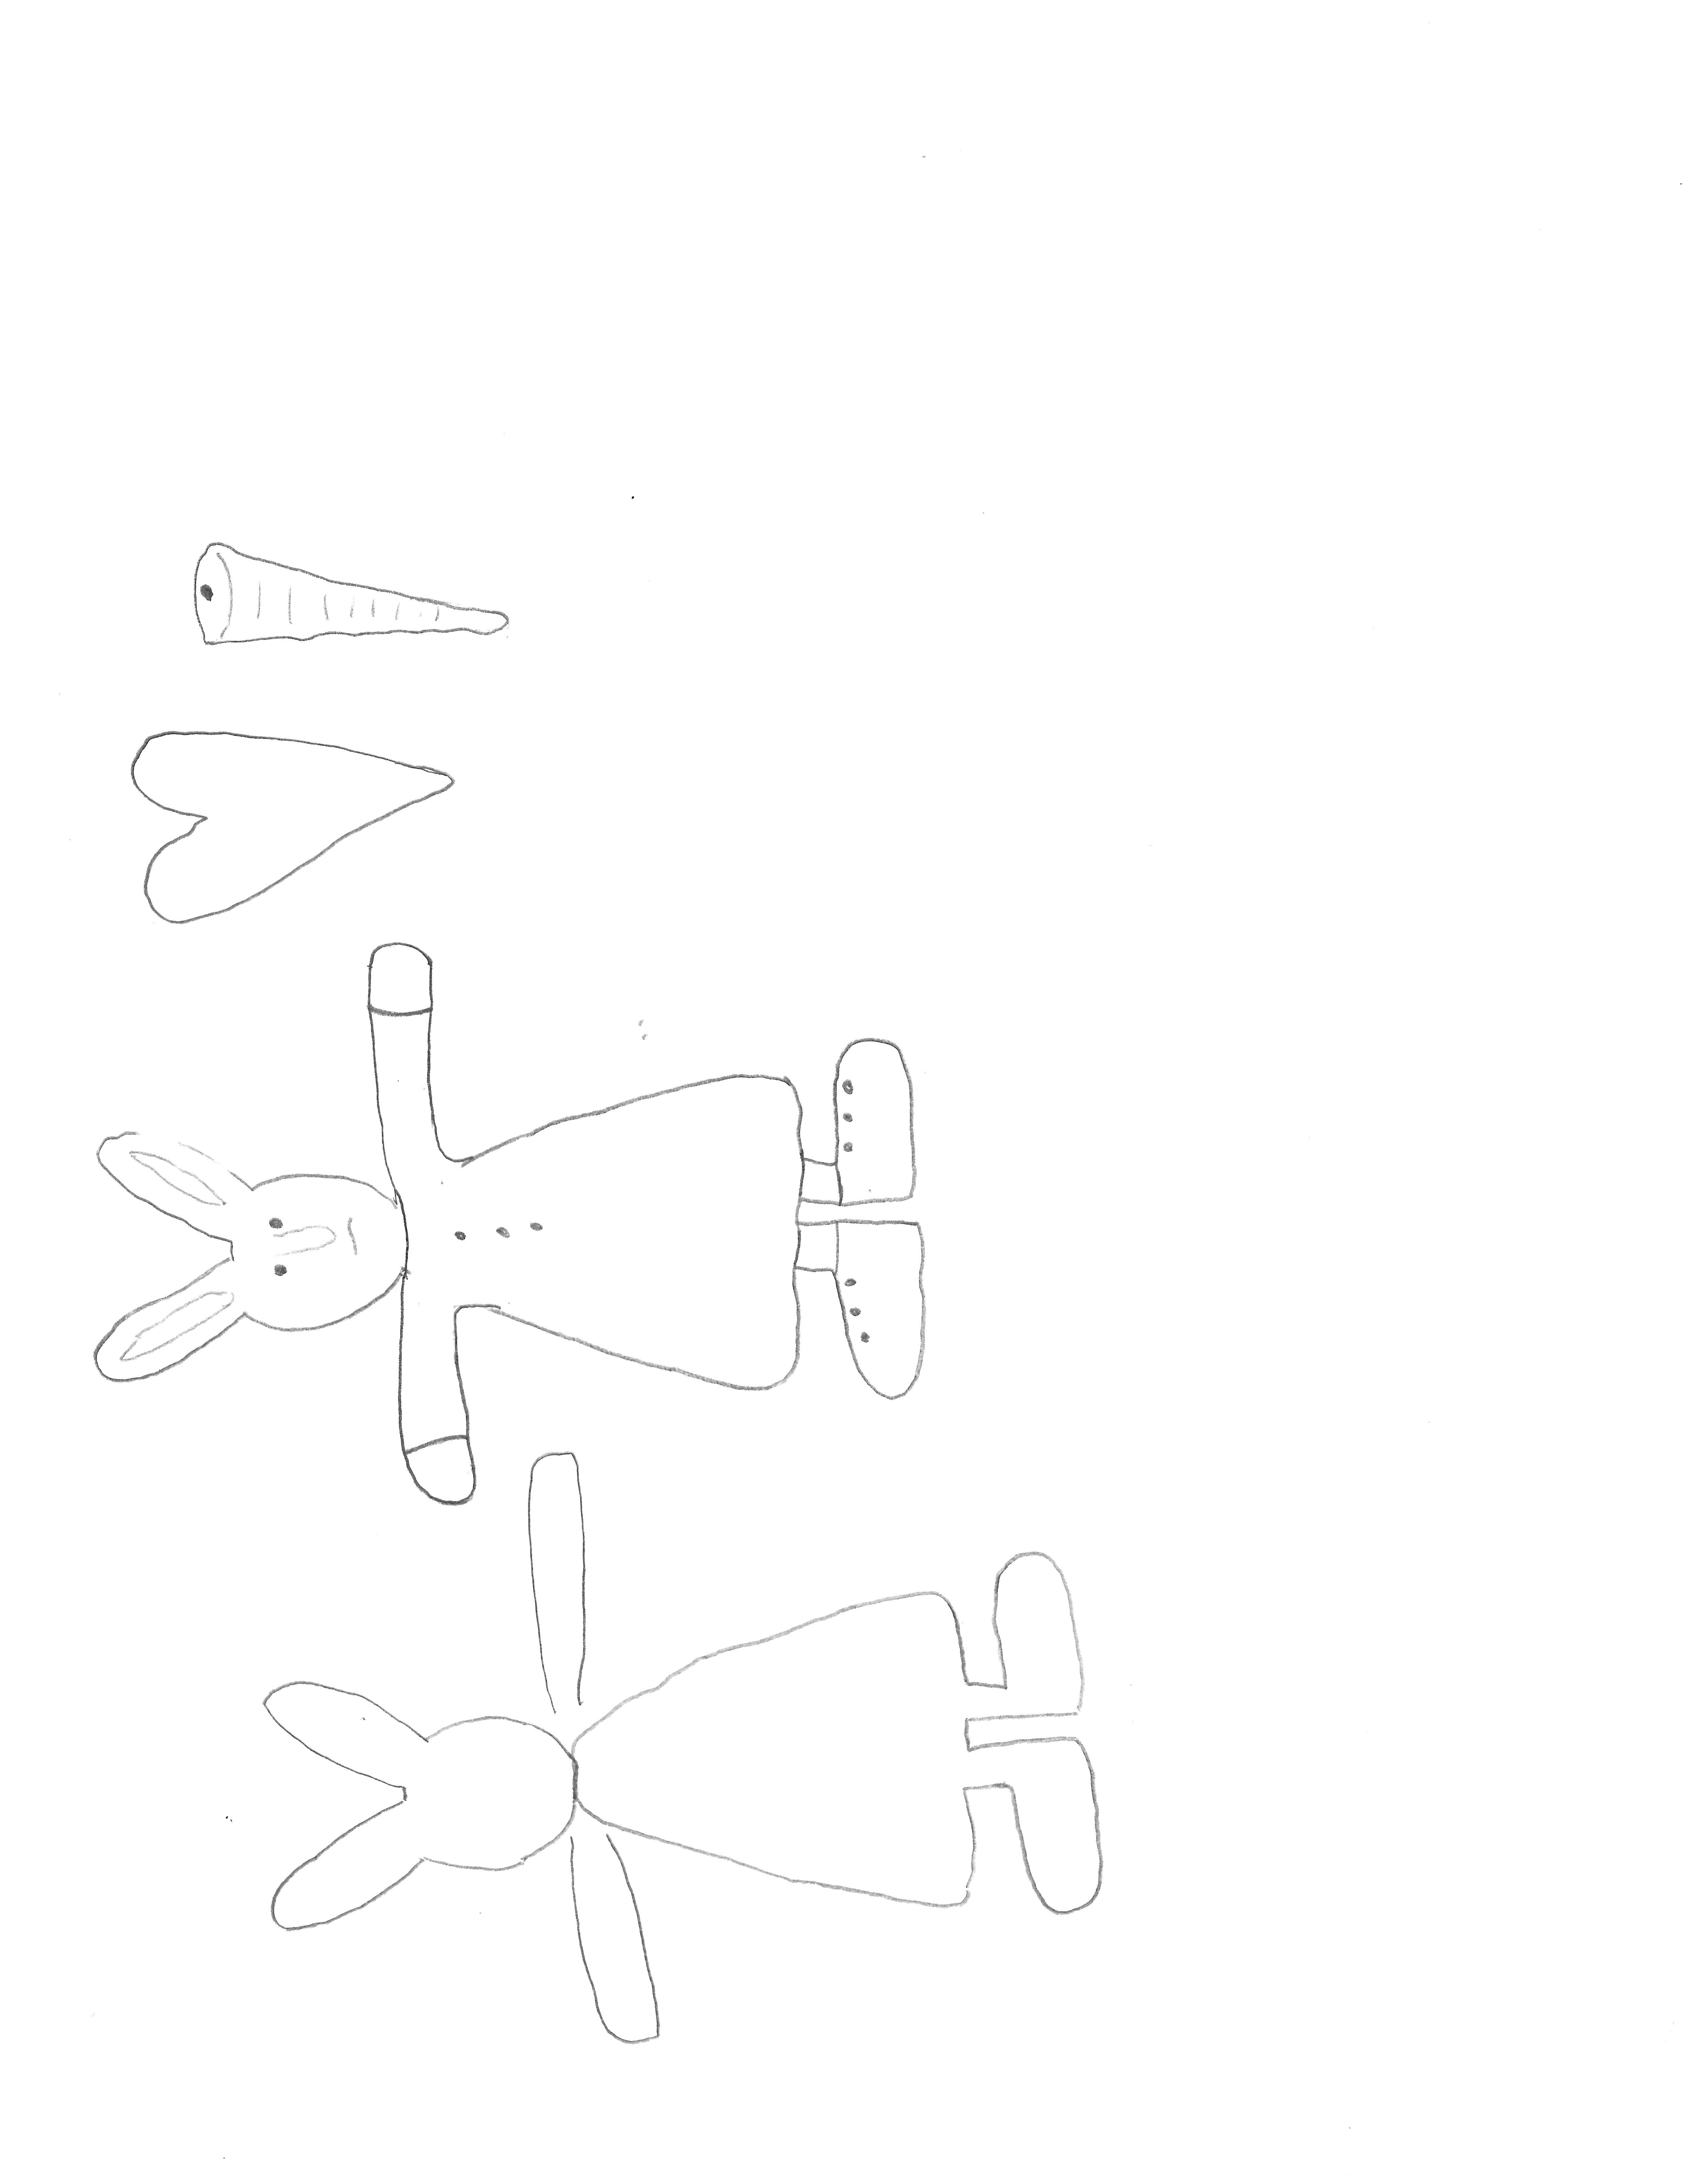
Clay Rabbit Girl

This little rabbit girl reminded me of spring. But she could hold a number of accessories making her a Valentine rabbit, spring, summer, Easter, or even fall and winter rabbit! I thought she would make a cute pin to wear too. Just glue a pin back onto the back side of her.
<<Rabbit Template
For this project, I used
- IOD air-dry clay
- paper wire
- DIY paints
- Tite Bond quick and thick glue
- Min-wax poly-acrylic gloss sealer
Steps:
- Form paper wire
- Flatten clay
- Glue paper wire to clay
- Trim
- Shape and mold
- Let dry
- Paint
- Distress and embellish
- Seal
- Attach backing
Pop-Up Card

You could use these pop-up cards as thanks yous, invitations, or place settings. Try making them with different styles. Library, garden, living room, party setting, school house, museum, or any other place you might find chairs. After making this project, try to come up with your own pop-up patterns.
<<Download your Card Template
Some tips:
- Print template in color (or use a colored pen/marker over the black lines to show colors)
- Use glue to adhere the small parts and tape to adhere the card edges
- Try different background ideas (floor and wall)
- Use a blade and cutting board for the small cuts
- Use scraps for embellishing
Stamp Cutting

It is fun to take your own image or idea and turn it into a stamp. Recently I tried cutting stamps from both rubber and linoleum tiles. Both are fairly easy, but there are pros and cons to each material.
Start with something simple, and try to progress to a more detailed stamp. Or start with a simple stamp and add detail as you become more confident!
Lino cutting
- less expensive
- cut pieces pop out easily
- harder surface
- shallower cuts word well
- works better for “printing” than “stamping” (lay paper on image and press)
Rubber cutting
- more expensive
- smoother to cut through
- cut pieces must be removed carefully
- easier to see pencil lines
- needs deeper cuts
- good for stamping
What I used
The set I got.
Another option
The smaller cutting tool

Fun images to cut
When cutting out your image, remember that what you cut out will be un-inked white space. The flat areas left on the lino or rubber will be inked and show as the printed/stamped image. You can cut out the shape with scissors to prevent having too much excess background (to ink or carve out)
Some links on this site may be affiliate links. This means if you purchase through the link I may receive a commission at no additional cost to you.
Book Paper Bulbs

I am ready for spring! I thought it would be fun to do these bulbs.
Try these fun book paper bulbs! (Template below). Once you try these out, you can try to make your own templates and three dimensional items. Modify the size or shape for a custom look. You can add color and other embellishments.
Download Template for fun
Heart Box

These don’t need to be only for Valentine’s day, make these any time of year for a special person or to decorate with!
Fill the boxes with a gift or secret note. Seal them up or keep the tops open. Try adding cording through the top and hanging them.
One of my favorite things about this project was the layered tissue paper. You can use this technique for other paper projects. Find a high-contrast background paper with an interesting image or pattern. Black on white images work really well for this. Decoupage a layer of tissue paper or light weight decoupage paper onto the top. If the tissue paper has large light areas, you will be able to see the background layer through the tissue layer.
See how to make a reusable template below!
Download & Print Template
What I used…


Heart Box: how-to
Reusable Template
Use any thick clear plastic for your reusable scoring template. I like using clear thin mounts for stamps. These are durable enough, yet thin enough to cut through. Also, they are fairly inexpensive and I usually have several lying around!
Merry Christmas!

Merry Christmas from Curious Farms Market.
Thank you for supporting us this year! Can’t wait to do new projects with you next year!
Advent day 24

It’s Christmas eve! Yay!!!
What to use on this paper
What to make with this paper
- Chalk ink / stamps
- Heat embossing / stamps
- Texture pastes / stencils
- Paint
- Colored ribbons
- Faux blackboards
- Gift wrapping
- Table runners (disposable!)
- Place settings (disposable!)
- Big or small crafts, cut paper to size
Advent day 23

Wowzers Christmas is just a couple days away!
Can you tell I have been busy with my new stencil making machine?
A final step for this project would be to seal it with a spray on or brush on sealer. Depending on the image and color of paste you use, your jar will come out looking completely unique- plus, once you add some fun items to the jar it will be even more interesting!
Use these for treats, candies, dried goods, cotton balls, bath salts, powder mixes and more!
We used a chalk paste, but you can use other texture mediums or DIY Frosting drops to make a thicker medium as well!

Can screen stencil
Use a screen stencil for the easiest application. Or you can try using a traditional stencil. If you use a traditional stencil, be sure to use a low-tack removable adhesive to ensure the stencil is on the glass jar. We recommend a thicker medium, such as a paste, which will be less likely to slide off the glass like ordinary paint.